SIMPLE ART LEDGES: Now that I’m back to being my productive self ?, I figured I should really post a few projects I made last year that never made it onto the old bloggity blog – like this one! Queue the endless ramblings…
Do you ever look around your place and think that something’s missing? You have all the essentials (furniture etc.), but for some reason, the room lacks personality. For me, there are two ways to solve this problem – plants or artwork! Or both! Ooooooohhh…
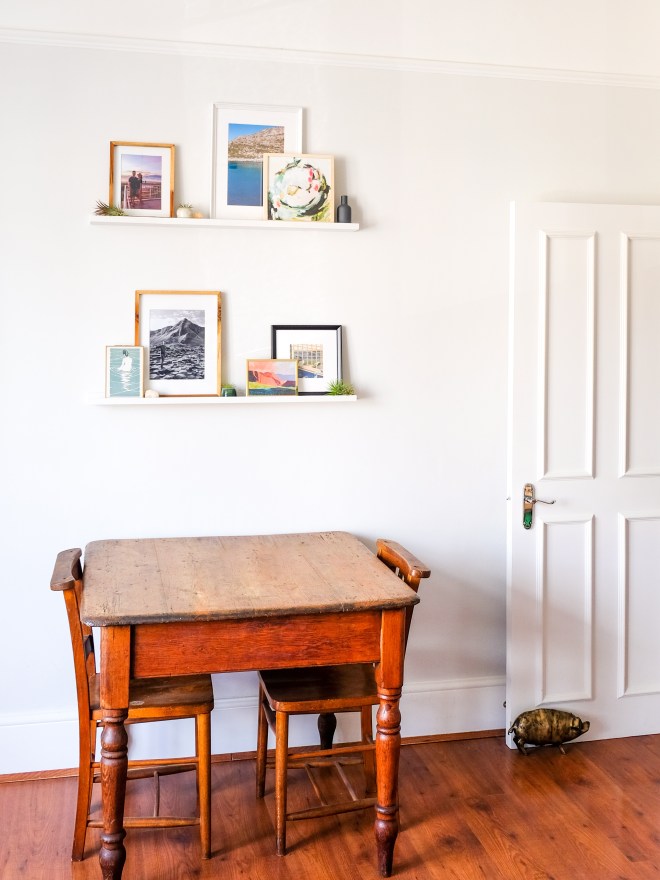
Our flat was seriously lacking in the personality department for a while, so I started to remedy it through an assortment of items (juju hat, abstract paintings, baskets, an old flag), but the wall above our tiny dining table still needed help.

SIMPLE ART LEDGES
Now, I’m a big fan of gallery walls (done them 3 times in previous apartments) but I wanted something ‘looser’ this time. Something that I could adjust when the mood struck. Maybe it’s because I’m feeling inspired by everything that Jenny Komenda does lately, or maybe it’s the fact that I feel loath to fill a million nail holes someday.

Enter the art ledge! Dun dun dun… The perfect option for those feeling a bit lazy in the whole hanging-a-gallery-wall department. Not to mention – is it just me or are we all getting a bit tired of gallery walls?
I mean, don’t get me wrong, when they are done right they are amazeballs… but they just feel a bit overdone these days. Since I didn’t feel like I had the right wall or a great collection of pieces to display as a gallery, it didn’t feel like the right move here.
Back to the art ledge!


Aren’t the above rooms gorgeous?
The space I had in mind for them wasn’t huge, but when I looked around at ready-made options, they were all too short (or not solid wood – so cutting them down wasn’t an option). I wanted something the same length as the table itself, so figured why not make my own?
All you need are a few pieces of wood, finish nails, wood glue, appropriate filler, and sandpaper. (Depending on how you want to finish them, you’ll also need either paint, stain and/or varnish.) It only took me like 30 minutes to cut and assemble the ledges. Easy peasy!
I took photos of the assembly but lost them (it was ages ago). But then I realised, there are waaaay better tutorials out there than the one I was making. Why add to all the great content already in existence?
If you’re looking to DIY some yourself, check out this tutorial from Chris Loves Julia, this one from A Beautiful Mess, or this one from Little House on the Corner. Honestly, it’s so simple and there is no right/wrong way to do it. Just go to your nearby DIY store (I used B&Q) and find the strip wood that fits the style/size you’re looking to build.
I decided to paint mine the same colour as the wall so that they would blend in and allow the artwork to be the focus. They would look equally awesome as wood too… there was just too much already in the form of the table/chairs/frames etc.
They’re mounted with some simple screws that we had lying around. Sure, I could have pre-drilled larger holes to sink them into the wood (and then fill/sand) but I just couldn’t care enough. This way, if I ever want to remove them, I can do it without any extra hassle. Also, since they’re painted the same colour (and generally covered with artwork) you can’t tell they are there.
And that’s it! Super simple and easy to change on a whim. My kind of project! Why not make some yourself?