As I have mentioned before, I love Anthropologie! Richard automatically groans when we are near one of their shops, as he knows I want to go in. And their home stuff is my absolute favorite! So when I saw their Christmas ornaments online, I couldn’t help but fall in love! There were a few that I immediately wanted for my tree.
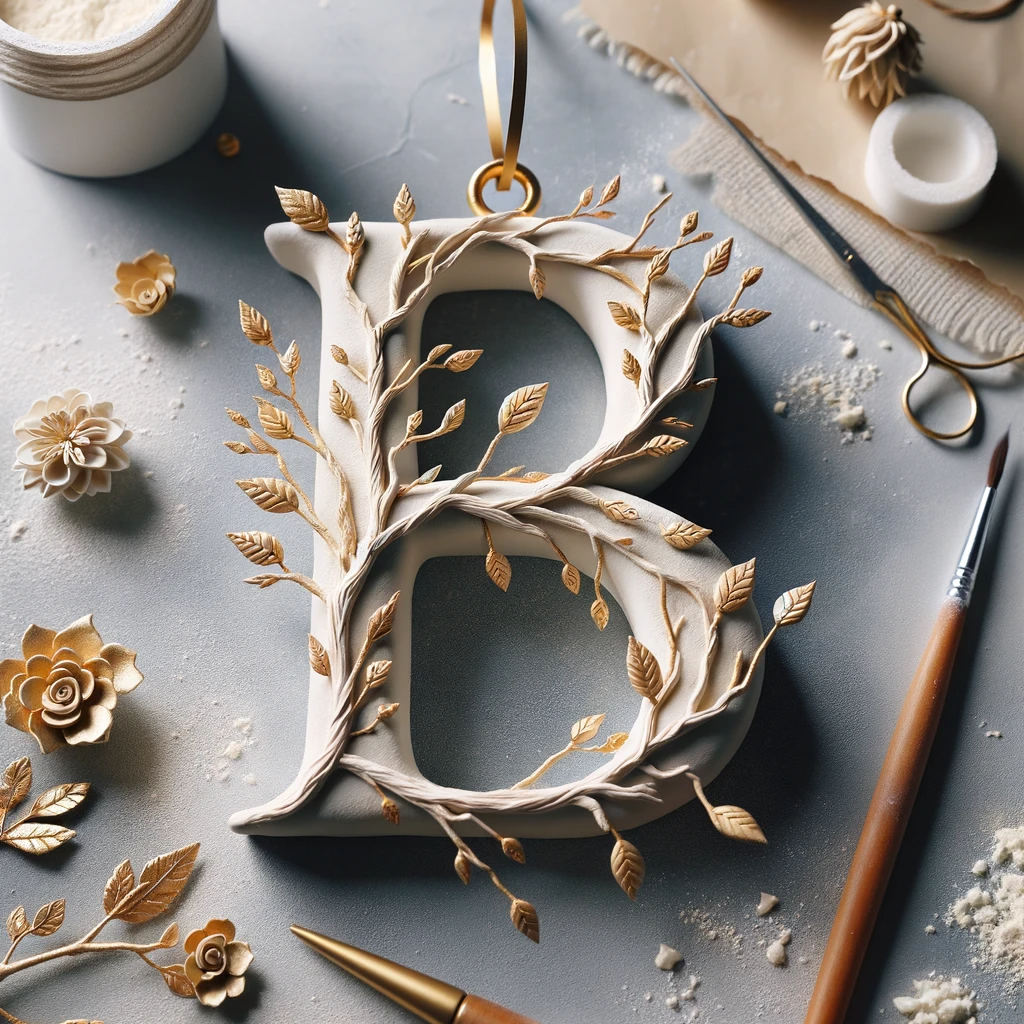
Buuuut… I’m cheap, and thought I could make my own! First up on my list were Anthropologie’s Budding Monogram ornaments. I loved how they looked like branches, and figured I could make them out of clay!
My first thought was that I didn’t want to make the flowers and leaves out of clay, as they would probably break off too easily. As I knew that I was going to spray paint it gold in the end, I figured I could use flowers from another material and no one would know. I wanted to buy some tiny fabric ones, but Hobbycraft came up empty. If you’re in North America, check Michaels as they have much larger stocks and probably have something perfect. In the end, I cut the leaves and flowers out of a thin sheet of foam.
My second thought was to make a wire shape, and then build the clay around it. Great in theory, but the air-dry clay is too dry for that – it doesn’t stick to the wire. Instead, I just used the wire to make hooks, and the shapes are 100% clay.
So if you’re thinking of making some branching letter ornaments of your own, why not try this tutorial?
Materials:
- Air-dry clay (I used this one)
- wire + cutters/pliers
- thin foam sheet or fabric flowers/leaves
- scissors
- gold spray paint (I used this one)
- super glue
- ribbon to hang ornament
Step 1. Roll clay into a long rope, and shape into letter form. Add some little branching points using small pieces of clay. Using a knife or other tool, carve grain into the clay.
Step 2. Twist a small section of wire into a loop and insert into the top of the ornament. Allow clay to dry completely.
Step 3. Cut out flower and leaf shapes from the foam (if not using fabric ones) and super glue to the letter as desired.
Step 4. Spray paint ornament in light layers, until completely covered.
And that’s it! While they aren’t perfect, I think they actually turned out better than I thought! I finally saw the real ones in store the other day, and they are much larger than mine! However, I am perfectly content with the size, as some ornaments these days are too big and heavy – they weigh down the branches too much. For our little tree, the scale is perfect!
So what about you? Any handmade ornaments this year?