One of Richard’s childhood memories is coming home after school, to his mom making fresh scones. He would sit at their breakfast bar, with a cup of tea and a scone, and tell her about how hard his day was (he had to colour for hours 🙂 ). When I first heard that, I immediately wanted to find a great scone recipe, so I could do the same for him now. I wanted him to come home from work to fluffy, light, layered scones.
However, the first couple of recipes that I tried never lived up to their pictures. It sort of bummed me out, and I put off finding a good recipe. That is until I was asked to make scones for someone’s wedding. That sort of put the fire under my butt that I needed!
So I decided to try Mary Berry’s recipe for classic Devonshire scones. Well, they had the same problem as the ones before, but this time, I decided to tweak them until they came out the way I wanted! Scones tend to fall into two camps – slightly dry and crumbly, or softer and layered. The first time I made this recipe, they definitely fell into the first category. And I’m not the biggest fan of the crumbly kind of scones.
on the left are the scones from the first attempt – and on the right are the scones after I tweaked the recipe I started thinking about it – crumbly is because of a lack of gluten development. Most scone recipes tell you not to work the dough very much – just press it together a couple times and cut it out. But that’ll end up with crumbly scones. If you want them to hold together better, you’ll have to knead the dough briefly – like 10-15 turns of kneading. By working the dough a bit, you’ll end up with a softer, fluffy texture – just the way I like them! Oh, and be sure to roll them out thick! If they’re less than 1/2″ in height, then they won’t rise as much. The thicker you roll it out to, the more they grow!_
Oh, and the original recipe said to use a mixture of egg and milk to wash the scones, but I found a whole egg worked best. I tested a few different options (egg + milk, egg white only, etc. etc.) and found that the best colour and shine came from a beaten whole egg. Feel free to sprinkle the scones with a bit of sugar if you want as well!
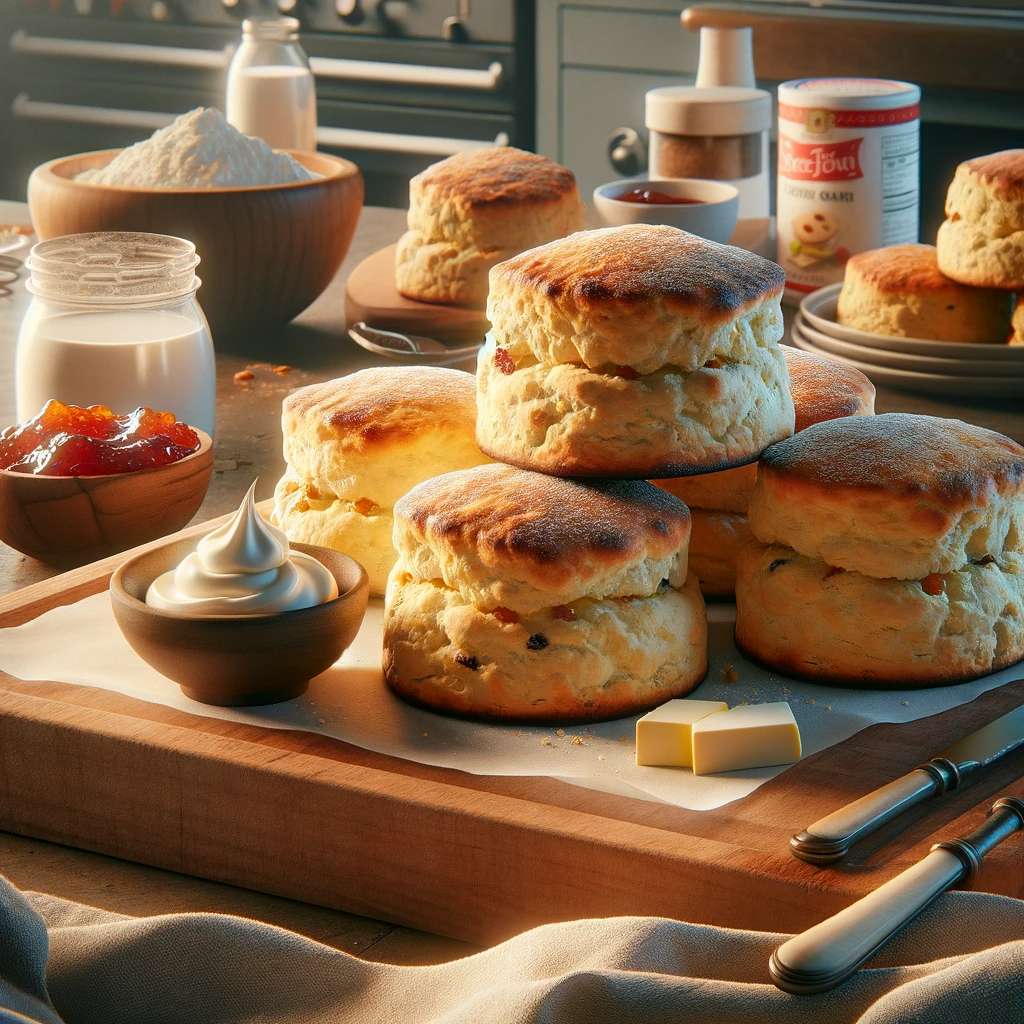
Now all you need is some clotted cream and fresh fruit jam! Of course, then you’ll need to decide if you’re the type who adds the cream first or the jam. Apparently, it’s a bit of a controversy over here. 😉 You can make your own clotted cream really easily if it’s not something your local grocery store stocks. All you have to do is cook heavy cream (whipping) in the fridge overnight! Serious! The slow heat separates the fat from the rest of the cream, and it rises to the top. Just scoop it off and whip it if you like yours fluffy (or not).
I used this recipe to make some myself! It’s so simple and just takes time. You don’t need to make as much as the recipe says, but simply fill your dish with heavy cream until it’s about 1-2″ high. It may only take 8 hours until the skin turns yellow on top, but longer (about 12 hours) if you’re making a big batch. If you’re not able to get some locally, it’s a great way to get proper clotted cream, no matter where you live.
So why not treat yourself to some proper clotted cream and scones, and have a mini high tea at home?
My Perfect Scone Recipe
Ingredients
- 435 g all-purpose flour
- 7 tsp baking powder 28g
- 50 g caster berry sugar
- good pinch salt
- 75 g unsalted butter
- 3 eggs
- 190 ml whole milk
- 1 tsp vanilla extract/paste optional
Instructions
- Pre-heat the oven to 215°C (420°F) or 200°C if using convection. Line two baking trays with parchment paper.
- Sift the flour, baking powder, sugar, and salt together, and place into a food processor. Add the butter and pulse until it resembles fine breadcrumbs.*
- Beat 2 of the eggs together until blended and pour in the milk to make up 240ml. Stir in the vanilla, if using. Beat the remaining egg in a small bowl for glazing the scones later.
- Gradually add the egg/milk mixture to the dry ingredients and mix until it comes together.
- Turn the dough out onto the table and knead about 10-15 times, until smooth. Lightly flour your surface and roll the dough to a thickness of 1-2 cm (1/2 – 3/4 inch).*
- Use a circle cutter to stamp out the dough by pushing the cutter straight down into the dough (as opposed to twisting the cutter) then lift it straight out. This ensures that the scones will rise evenly and keep their shape.
- Gently push the remaining dough together, knead very lightly then re-roll and cut more scones out as before.
- Arrange the scones on the prepared baking trays and brush the tops twice with the egg wash. Bake for about 10-12 minutes or until the scones are well risen and golden.
- Cool on a wire rack, covered with a clean tea towel to keep them moist. Serve as fresh as possible, cut in half and spread generously with jam and a good spoonful of thick cream.